Shader Graph
Chroma provides a set of Shader Graph nodes to help you create shaders. These nodes are used to sample gradients and curves.
Note: Gradients and curves are only a part of Chroma. For the full list of attributes, see Shader UI Attributes.
Adding a Gradient to a Shader Graph
To create a gradient, you need to add a [Gradient] attribute to your Shader Graph.
Adding a Gradient to a Shader Graph
The property type of gradient is always a texture (Texture2D in Shader Graph and 2D in code). The texture is a 1D texture that contains the gradient data. It is created automatically when you add a gradient property to your shader.
Gradient properties take two parameters:
Resolution- The resolution of the gradient texture. The higher the resolution, the smoother the gradient. The default value is 256. If you’re noticing banding (staircase effect) in your gradient, try increasing the resolution to 512 or 1024.HDR- Whether the gradient is HDR or not. The default value isfalse. HDR means that the gradient can have values greater than 1.0. This is useful if you want to use the gradient to control the intensity of a light, or make parts of an object emissive.
Do not forget to set Chroma as the Custom Editor GUI in the shader’s Graph Settings. This will allow you to use the Chroma UI.
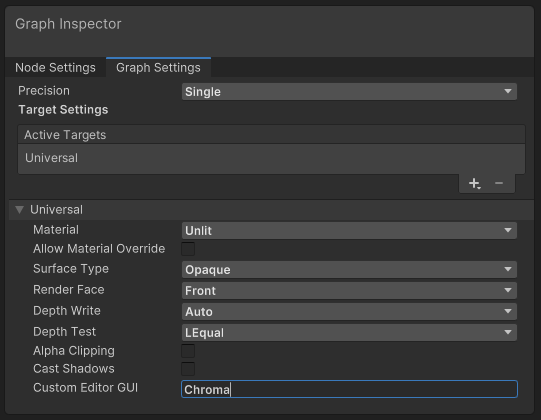
The shader graph settings. The Custom Editor GUI must be set to Chroma.
Nodes
Chroma provides the following Shader Graph nodes:
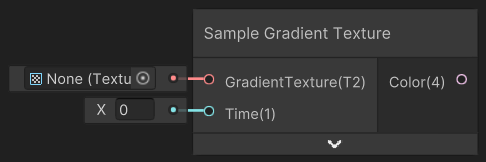
- Sample Gradient Texture - allows you to get a value from a gradient.
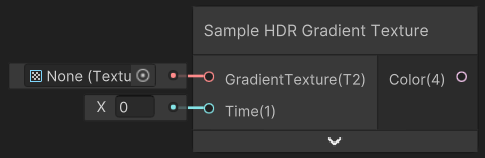
- Sample HDR Gradient Texture - allows you to get a value from an High Dynamic Range gradient (with color brightness greater than 1.0).
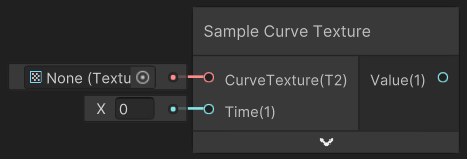
- Sample Curve Texture - allows you to get a value from a curve.
Example Shader Graph
Let’s look at a simple example using Shader Graph. It uses a gradient to control the color of the object and a curve to control the specular highlight.
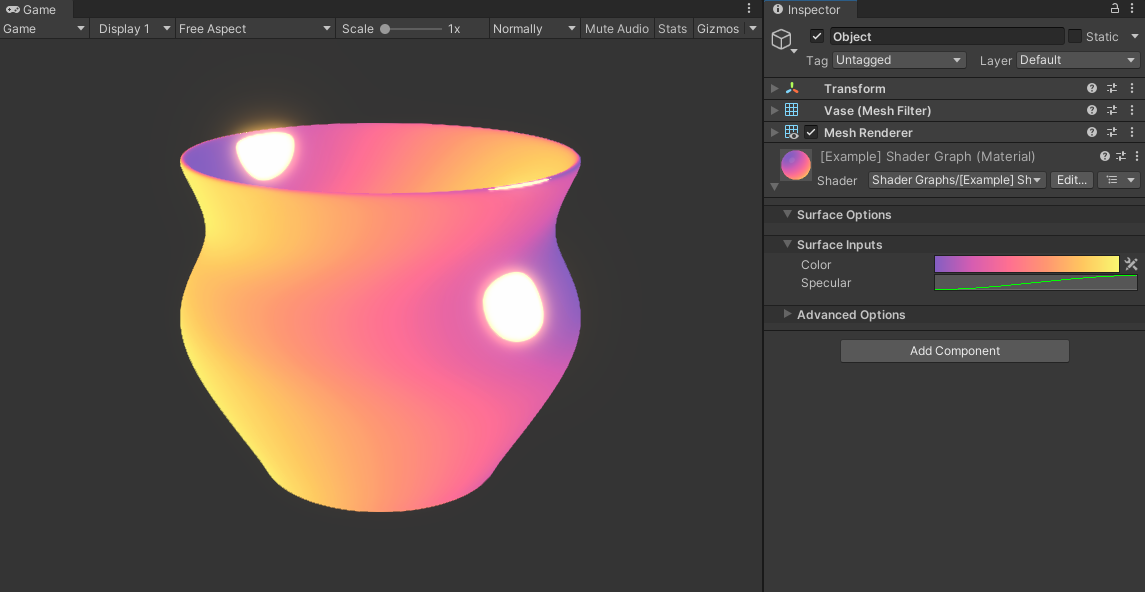
Final result of the example shader. The gradient is used to color the object and the curve is used to control the specular highlight (bright yellow spots).
Note: The example shader uses the Universal Render Pipeline, but the usage of Chroma is the same for all render pipelines.
Shader Graph
The shader graph for this shader is shown below. It’s a very simple shader graph that uses a gradient to control the color of the object.
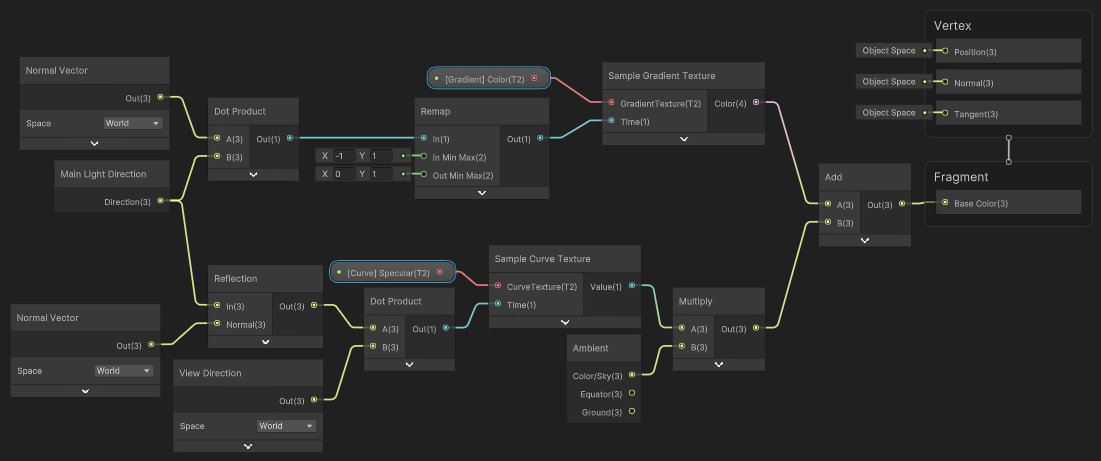
The shader graph for the example shader. With just one gradient and one curve we can create a very flexible shader. Click on the image to see the full size version.
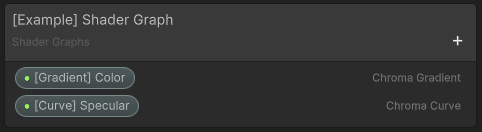
The shader graph blackboard (inputs). The gradient and curve are declared as properties.
Break Down
To color the object we are using the Sample Gradient Texture node. The GradientTexture input is the gradient we want to sample. The Time input is the 0-1 point at which we whould like to sample the gradient. In this case we are using the dot product of the world space normal and the world space light direction. This means that the gradient is applied to the object based on the angle of the light and the normal of the object. This is a very common technique used to create a very flexible look.
Below is a Sample Curve Texture node. This node is used to sample a curve. The CurveTexture input is the curve we want to sample. The Time input is the 0-1 point at which we would like to sample the curve. In this case we are using the dot product of the world space normal and the world space view direction. This means that the curve is applied to the object based on the angle of the camera and the normal of the object.
That’s it! You can now use gradients and curves in your shader graph. For more information on how to use gradients and curves, see the Gradient and Curve pages.
Amplify Shader Editor
Chroma also supports Amplify Shader Editor. Please see the Amplify Shader Editor page for more information.