Gradient
Gradient Brief Overview
Gradient is a shader parameter that allows you to create a smooth or stepped transition between two or more colors. It’s a great way to add some visual interest to your materials.
Gradients are useful in virutally any shader. For example, let’s say you’re creating a terrain shader that changes color depending on the height of the surface. You can use a gradient to smoothly transition between colors as the height changes. You can use the alpha channel of the gradient to control the impact of normals on shading and boom, you have the “Monument Valley” look in your game.
We’ve also seen gradients used in shaders that control the color of a fire, the color of a water surface, the color of a sky, the color of a fog, and so on. The possibilities are endless. Some of these examples are included in the Chroma Demos.
HDR Gradients
Often you need to use gradients in HDR lighting. For example, you might want to create a gradient that controls the color of a fire. In this case, you need to use an HDR gradient. HDR gradients are gradients that use HDR colors. This means that the colors in the gradient can have a value greater than 1.0.
To create an HDR gradient, you need to add a Gradient(HDR) property to your shader.
For an example of an HDR Gradient, please load the HDR Gradient Demo Scene located in Assets/Chroma/Demos.
Adding a Gradient to a Shader
For a detailed example of how to use gradients in shaders, please refer to the following pages:
Gradient Inspector
Chroma adds a Gradient Inspector to the Material Inspector window. The Gradient Inspector consists of two parts - Gradient Editor and a context menu.
Gradient Editor
The Gradient Editor is a tool that allows you to create and edit gradients. It’s a part of the Gradient parameter in the Inspector.
Clicking on an icon of the Gradient opens the Gradient Editor where you can freely add up to eight individual independent color breakpoints (color stops) and move them across the ramp. The layout of the colors on the breakpoints corresponds to the layout of the colors on the scene object the material is applied to. When you move the breakpoint or change the color values in Gradient Editor, the shading changes on the affected object(s) simultaneously, in real time. It is extremely useful for fine-tuning the color positions on the object. Also, it works for the models that have no UV maps.
There are ‘smooth’ and ‘fixed’ color gradations in the Gradient editor. You can have a sharp transition from one color to another by selecting a Fixed mode (using 1 color stop). If you select Smooth mode, the transition from color band to the adjacent one will be gradual. See the pictures below.
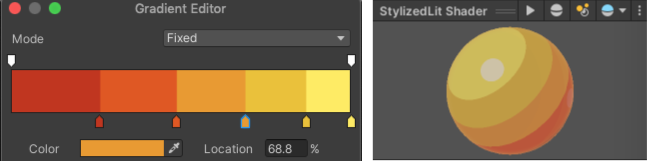
Gradient Editor in Fixed mode — the color bands have distinct boundaries
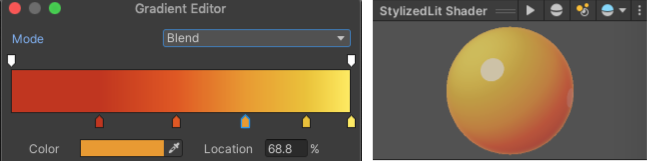
Gradient Editor in Blend mode — the color bands have gradual boundaries
In Smooth mode you can set all or some of the color stops closely to the adjacent ones to make a stepped (reminiscent of Fixed mode) or partially stepped / partially smooth gradient.
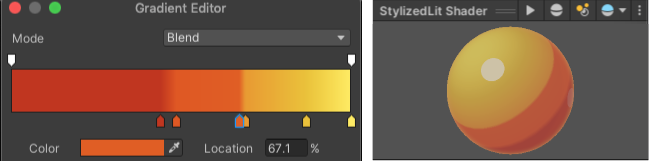
Gradient Editor in Blend mode with partially tight color stops
To get a smooth gradient your model should have smooth normals. Otherwise, even if you have the Blend mode chosen, but you have a model with hard normals, you’ll likely see a stepped gradient. If you have no option to edit a model, you can try adjusting the parameters in the model’s Import Settings
Presets
TIP. Whenever you make up an interesting gradient in the Gradient Editor, you can save it by pressing the ‘New’ button in the ramp presets section of the Gradient Editor. This adds an icon of the gradient to the collection, which is really useful if you want to quickly preview different possible gradients.
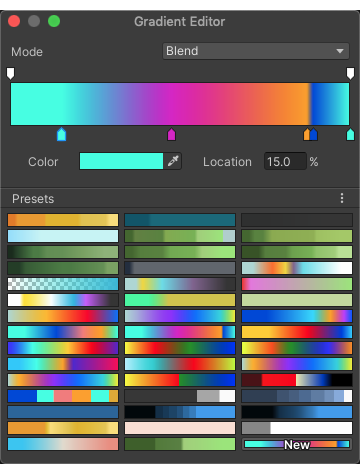 Using presets in the Gradient Editor
Gradient Context Menu
In the Inspector panel, next to the Gradient Editor thumbnail, you can find the Chroma context menu. It has a few useful operations listed that make the gradient editing and randomization easy.
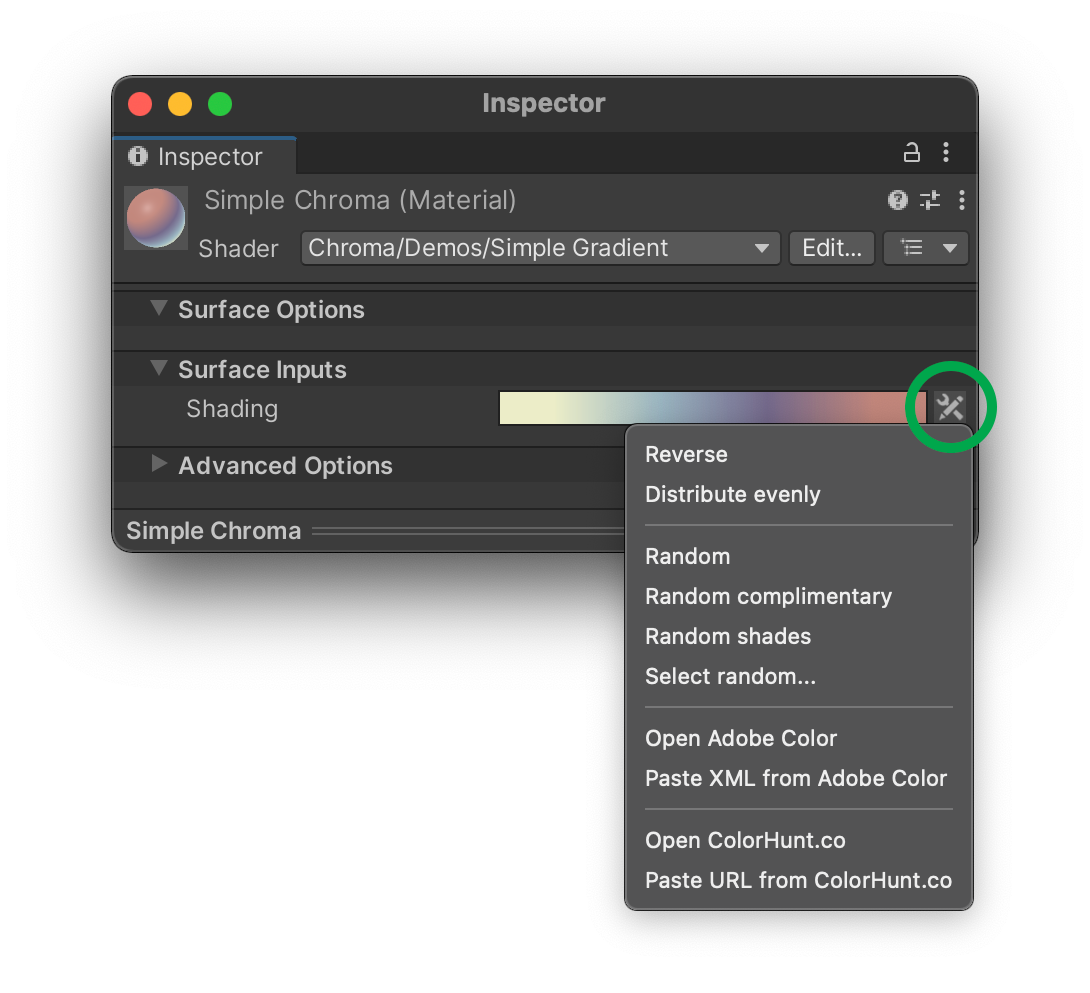
Gradient context menu
Randomization
You can create random gradients by using the Random and Random complimentary buttons in a gradient’s context menu. The Random button creates a gradient with 4 random colors that go well together. The Random complimentary button creates a gradient with random colors that are complimentary (opposite) to each other.
Adobe Color Integration
Chroma integrates with Adobe Color, a popular color scheme generator. You can use it to create gradients and then import them into your material.
ColorHunt.co Integration
ColorHunt.co is a great resource for finding color palettes. You can easily import a color palette from ColorHunt.co right into Unity shader UI that uses Chroma.
Gradient Synchronizer
Gradient Synchronizer is a script that allows you to synchronize the colors of a gradient across multiple materials. This is useful if you have multiple objects in your scene that use the same material and you want to change the color of all of them at the same time.
To create a Gradient Synchronizer script, go to Assets ▶︎ Create ▶︎ Chroma ▶︎ Gradient Synchronizer.
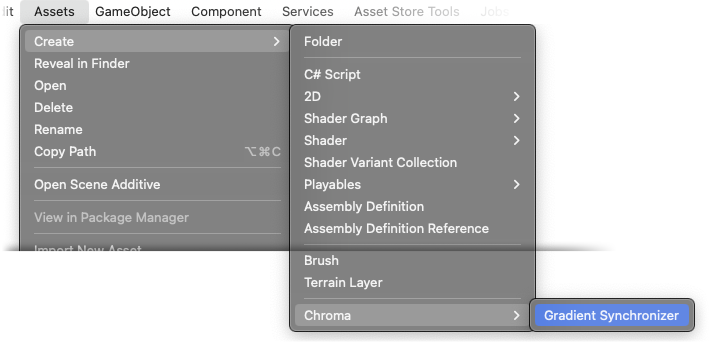
Creating a Gradient Synchronizer
Once created, the script appears in the Project window.
- Gradient The gradient to apply to the multiple materials.
- Reference Name The name of the shader property of the Gradient. This is the
Referencename in ShaderGraph and theProperty Namein the code shaders, e.g.Gradient_Shading. - Resolution The resolution of the gradient texture. Higher resolution will result in smoother textures, but will also use more memory.
- Materials The materials to apply the gradient to.
- Apply Applies the gradient to the materials.
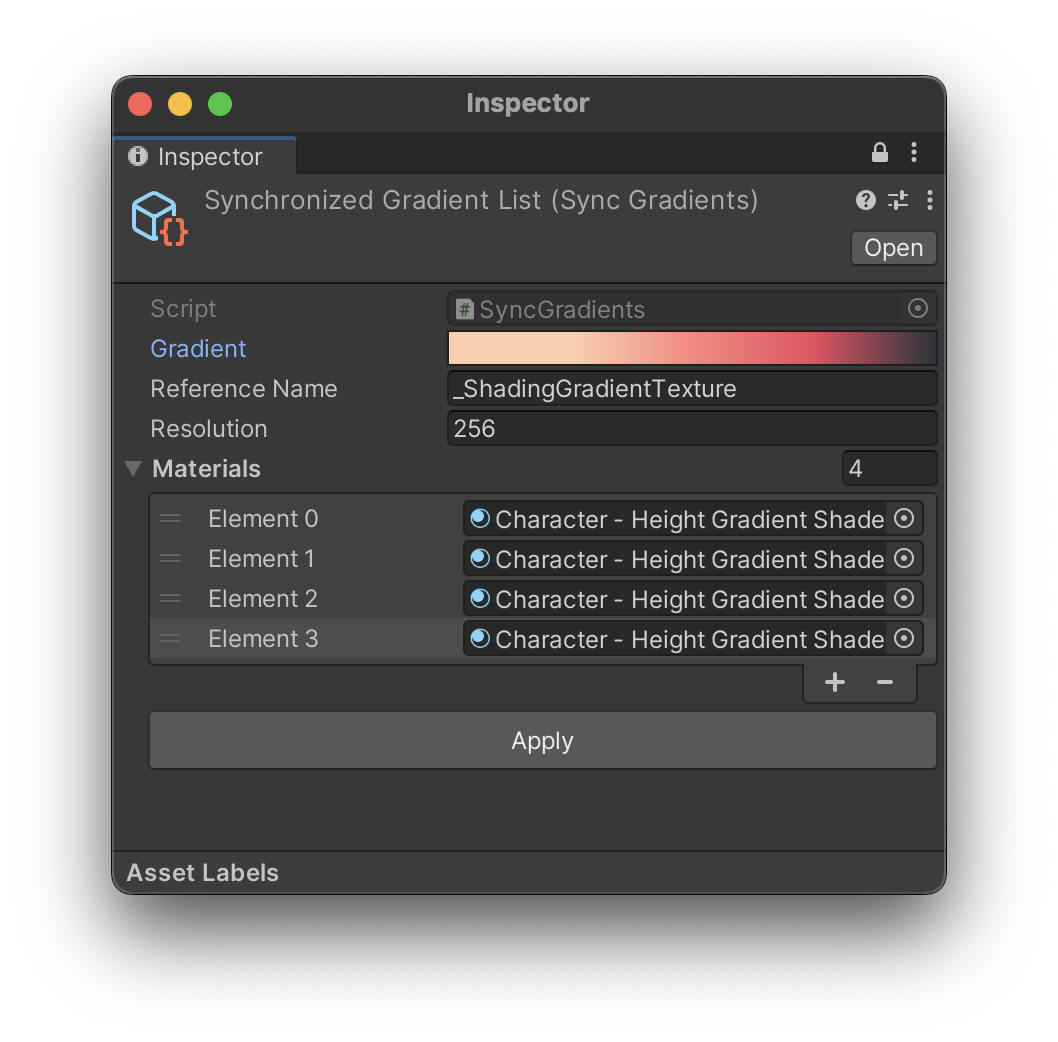
Gradient Synchronizer Inspector view